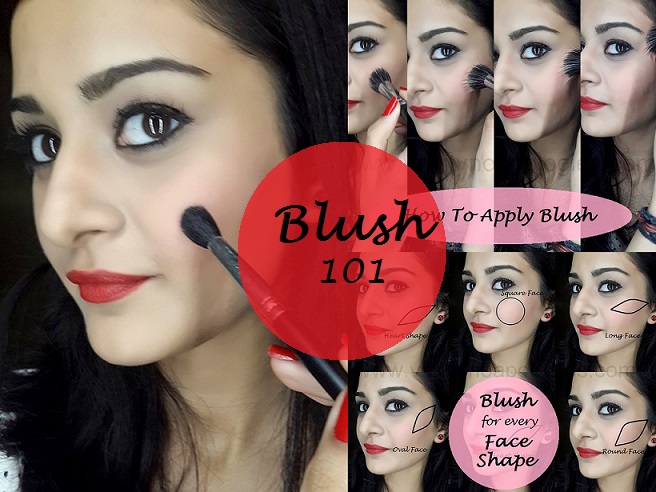
Trick Tuesday: HOW TO PUT ON BLUSH
By Contributor: Mahima
So you must be thinking that why am I doing a tutorial on blush as it extremely easy to put it on and look like a Barbie. BUT NO my ladies, blush has a way broader concept than just dusting the color on to your cheeks, trust me the way you apply your blush c an change the way your face looks. So there are a bunch of formulas of blushes available in the market- creams, liquid, powder. And further these are divided into matte, semi matte, satin, sheer tone, frost and etc. Here are few things that you need to keep in mind:
Choose blush according to your skin :If you are a mature lady, who has a bit of uneven skin of wrinkles than you should definitely go for ‘matte’ blushes as shimmer will accentuate the wrinkles on your skin.
Choose blush according to your skin tone: so here’s something we often ignore, we see a color and we get it regardless of the fact that it might not compliment our skin tone that well. If you are a lady who dark in complexion than ‘pale pinks’ like pink swoon by mac will not look that great on you, you should go for blushes with more reddish tones like dolly mix by mac. similarly if you are a fair lady then blushes with soft undertones will look best on you as blushes with red undertones might turn you into a clown and if you are medium skin tone lady then pretty much anything will work.
Choose blush according to your undertones: so you need to see if you have a worm or cool undertone and then choose blush accordingly.
Now lets move on to the application:
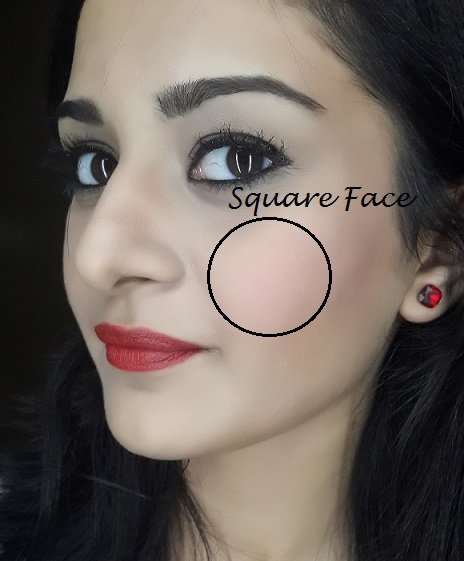
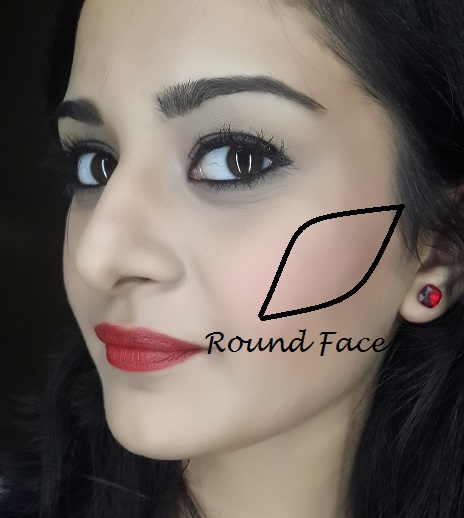
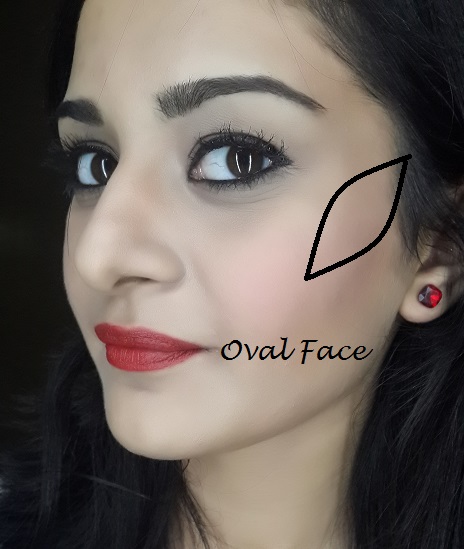
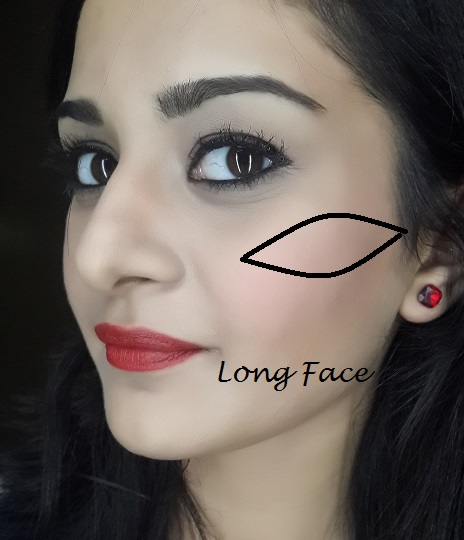
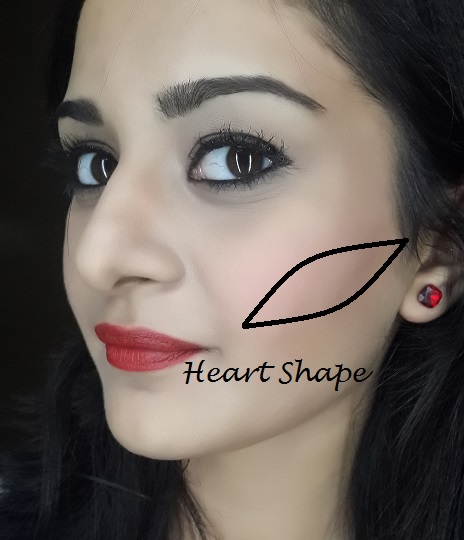
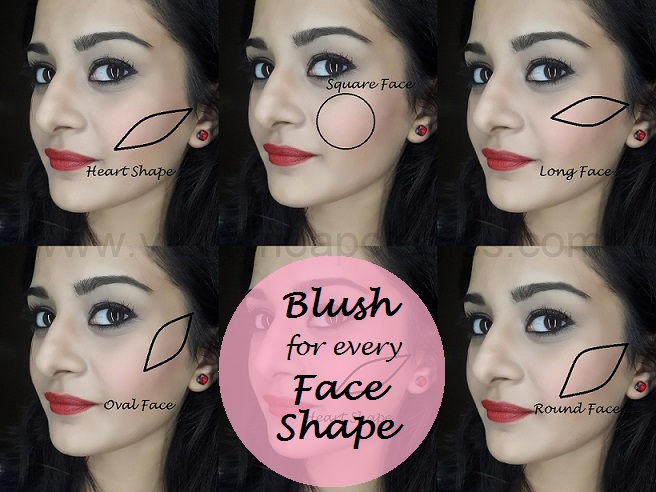
Apply your blush according to your face shape. Look at the face chart, it clearly shows you that at which part your blush should go so that it look absolutely stunning on your face shape.
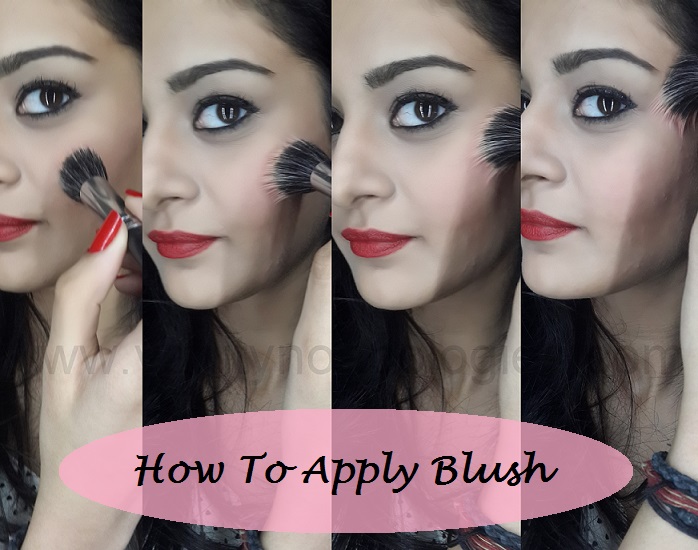
TIP: for almost all face shapes, drag your blush towards your temples you lift your face up. Don’t know how? Watch me do that!
So this part doesn’t required too many steps it just one step to perfection.
Step: Start of with taking your blush with a stippling brush(for sheer application)/paddle blush brush(for heavy application) and start from the apples of your cheeks and take it all the way upto your temples, you can also do this other way around which is, start from the temples and bring it to your cheeks.
If you’ll start from the apples of your cheek then you’ll get more concentration on your cheeks but if you’ll do the other way then you’ll get that ‘kim k’,’ jlo’ look. And you can also put a little bit on your nose, chin and forehead for an overall healthy look :D
BLUSH USED: Mac fleur power.
SO that’s all I hope this will help you put and will enable you to do it like proo ;)
AND do check out the tutorial for contouring and highlighting that you see in this FOTD if you haven’t checked it out yet.
Review, Price and Buy Online Moha Foot And Nail Cream At this point I might… Read More
Earlier this year I had this crazy idea to colour my hair bright pink. We… Read More
Review, Price, Buy Online Charmis Deep Radiance Face Serum with Vitamin C Vitamin C is… Read More
Review, Price, Buy Online Head & Shoulders Neem Anti Dandruff Shampoo I have this habit… Read More
Head & Shoulders Active Protect 2 in 1 Anti Dandruff Shampoo + Conditioner Review, Price,… Read More
Livogen Adult Tonic #RahoStrongIronStrong The past few months have been crazy, we can all agree… Read More
View Comments
This is an excellent tute dear! Loved the way you explained and piccys are super easy to understand! xoxo
thankyou so much gawthami<3
That's quite informative post. Book marked it :)
thankyou laks :D
This is excellent Mahima. The post was really helpful. But I must point out something. The upward stroke works better for square face ( I have one :( ) It slims it down. Applying in round form on the apple, makes my face look more squarish. :(
You are sooo pretty!! I wish my skin also looked like yours!
i thought you were oval nivi :P
It's the hairstyle that helps. :P
thankyou nivedita. yes it can make it look more square if you apply it on the apple and blending backwards, that will draw more attention to it.its like blending outwards means, putting blush over a large area and then that'll be enhanced, making the face look more square and bigger but if you put it right at the apples, trust me it'll make your face look more oval as it'll bring attention to a small areas making the face appear smaller :D and look at the 'TIP' which says blend it upwards definitely works on all face shapes as it lifts the face up.
Pretty spot on! Applying it horizontally with a slight tilt works best for me. :)
thankyou<3
definitely a round face i have....will try that technique :D thanks Mahima !
anytime milyy<3
Nice tutorial dear!
Great tutorial :)
Great tutorial!!
Awesome post :) Pinned it <3
The tutorial you provided in this post is amazing. Thanks a lot.